
How to Test Nail Drill Bit Quality Before Placing a Bulk Order: A Practical Checklist
How to Test Nail Drill Bit Quality Before Placing a Bulk Order: A Practical Checklist
How to Test Nail Drill Bit Quality Before Placing a Bulk Order: A Practical Checklist
How to test nail drill bit quality before placing bulk order? For QC and safety managers, the answer starts with a practical, repeatable inspection process. From raw material consistency and cutting performance to shank accuracy, coating durability, and packaging compliance, every detail affects product safety and customer satisfaction. This checklist will help you evaluate suppliers more confidently, reduce bulk-order risks, and ensure the nail drill bits you approve meet professional quality standards.
The difficult part is not identifying obvious defects. Most factories can send a clean-looking sample. The harder job is spotting the problems that only show up after repeated salon use: bits that run slightly off-center, flutes that cut too aggressively at the start and then lose bite, coatings that look even in the tray but wear fast after sanitizing, or shanks that technically measure right but still feel unstable in certain handpieces. Bulk risk usually hides in that gap between a presentable sample and consistent production.
If you are approving bits for professional nail care, test them as tools used by working technicians, not as static accessories. A bit may pass a visual check and still fail where it matters most: heat control near the cuticle zone, vibration during long filing sessions, dust release when removing product, or cleaning performance after contact with gel residue and skin debris. That is why a practical checklist should follow the real use path from incoming material to post-use inspection.
Start with material and geometry, not packaging
Before running any use test, confirm what the bit is actually made from and whether the cutting geometry matches the intended job. In nail bits, the material affects wear resistance, edge retention, and how the bit behaves under friction. For example, tungsten steel is commonly chosen when durability and stable cutting are priorities. But even when the material specification is acceptable, geometry still decides whether the bit is suitable for surface refining, product removal, sidewall cleaning, or dead skin work.
This is where many buyers make a weak comparison. They line up two samples, see similar shapes, and assume the performance will be similar. It often is not. Check the flute definition, edge uniformity, transition zones, and tip finish under magnification. A bit with uneven tooth spacing or inconsistent transition from fine to coarse may produce irregular cutting feel, especially when a technician changes pressure during service. That inconsistency matters more in training schools, chain salons, and OEM programs where many users handle the same model in slightly different ways.
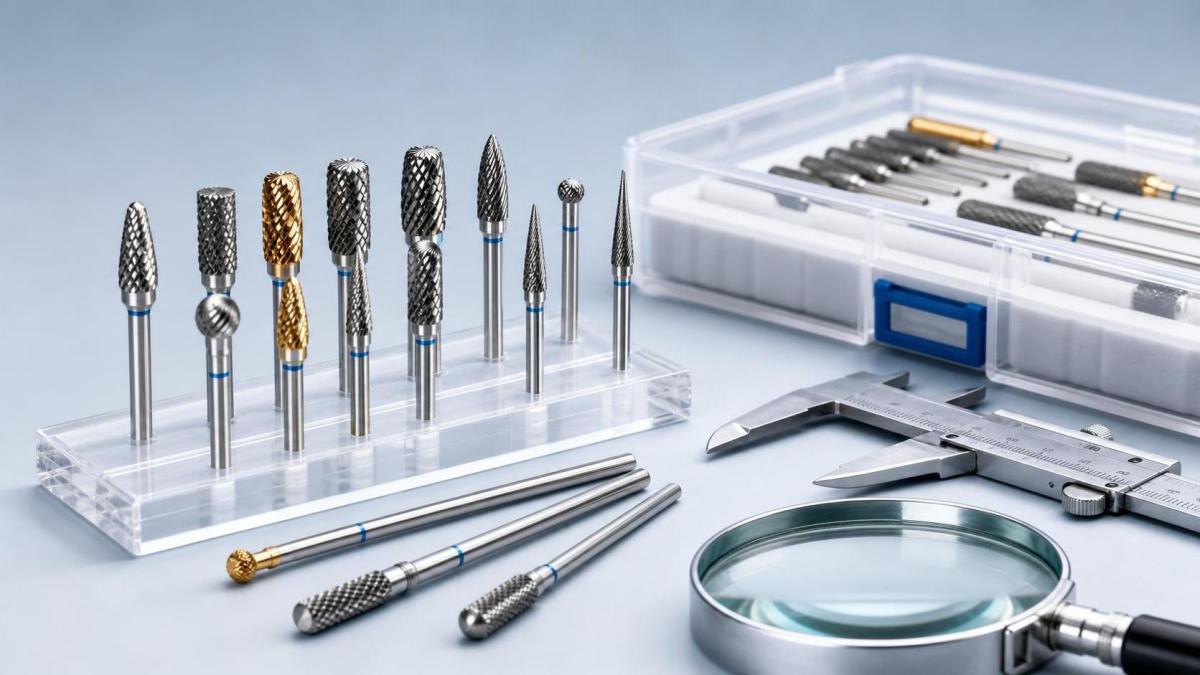
For a multi-use design, the transition area deserves extra attention. A product such as 5-in-1 Multi-Functional makes sense in nail care because one bit may need to move between shaping, smoothing, gel polish removal, and detail work without forcing the technician to switch tools too often. In that kind of design, the surface progression cannot be visually rough or abrupt. If the change in grit profile is poorly controlled, the bit may leave uneven scratch patterns or surprise the user with a sharper cut than expected.
Runout and shank accuracy decide whether the sample is truly usable
A nail drill bit can be made from good material and still become a complaint source if the shank is not consistent. In professional settings, 3/32 inch shank size is widely used, but nominal size alone is not enough. What matters is whether the shank inserts smoothly, locks securely, and runs concentrically in common e-file handpieces. Small deviations become obvious once the speed increases. Users describe it as chatter, skipping, hand fatigue, or a feeling that the bit is pulling rather than cutting.
The practical test is simple. Mount several pieces from the same sample lot into more than one handpiece model if possible. Spin at low, medium, and working speed. Watch the tip against a fixed visual reference and listen for sound changes. Then stop and reinsert. A bit that only runs well in one chuck condition is not reliable enough for bulk approval. This matters even more when you supply distributors across different markets, because end users may pair the same bit with machines from different brands and maintenance conditions.
Bidirectional use also needs confirmation, not assumption. If a supplier claims the bit can operate clockwise and counterclockwise for both left-handed and right-handed technicians, test both directions on the same material removal task. Reverse rotation should not create a noticeably harsher feel, unstable tracking, or premature edge breakdown.
Cutting performance should be judged by control, not by speed alone
Fast removal impresses in a short demo, but it is a poor single measure of quality. For salon safety and service consistency, controlled cutting is more important. A good test sample removes product predictably, maintains contact without bouncing, and gives the operator enough feedback to stay precise around thinner nail areas. Too aggressive is not automatically better. It may increase the chance of heat spikes, over-filing, and technician error, especially for less experienced users.
Test on more than one substrate if your market includes mixed applications. Gel polish removal, reshaping, surface refinement, and dead skin work place different demands on the same bit. Coarse teeth that perform well on hard overlay reduction may feel unsuitable near delicate finishing areas. Fine or medium options may provide better control but shorten service time efficiency in heavy removal tasks. This is why sample evaluation should include at least the grit grades you expect to stock, not just one showcase version.
In field discussions, one recurring complaint is that a sample feels smooth during the first trial and then loses sharpness quickly after routine cleaning and repeated appointments. You do not need a complicated lab setup to catch early signs. Perform repeated use cycles, brush-clean the flutes, inspect the cutting edges, and compare the effort needed across rounds. If the operator starts increasing pressure to get the same result, wear stability may be a concern.
Heat, dust, and post-use cleaning are where user satisfaction is often decided
A bit that cuts cleanly but runs hot will still create returns. Heat generation depends on several factors: material hardness, flute design, rotational stability, operator pressure, and the product being removed. You are not trying to produce a universal temperature number here; that would require controlled test conditions and equipment many buyers do not use. What you can evaluate reliably is comparative behavior. Under the same operator, handpiece, speed setting, and workpiece type, does one sample build heat faster than another? Does the user feel the need to lift away more often? Does dust accumulate in a way that reduces visibility?
This is also where corrosion resistance and cleanability matter. Nail bits live in a cycle of use, brushing, disinfection steps defined by the user’s operating practice, drying, storage, and reuse. Debris packed into poorly finished flutes slows cleaning and can make the bit look older than it is. A corrosion-resistant surface and a design that can be cleaned effectively with a nail brush are not marketing details; they affect whether the tool remains acceptable in daily professional handling.
Check consistency across the sample set, not just the best-looking piece
One sample is a sales sample. A useful pre-bulk test needs a small set pulled from the same batch. Look for variation in color finish, flute sharpness, tip shape, labeling, and packaging. If the product includes fine, medium, and coarse specifications, compare whether the differentiation is clear enough for warehouse staff and end users to identify correctly. Misidentification at packing stage can become a costly but avoidable issue, especially in OEM or private-label orders.
This is one area where experienced suppliers tend to separate themselves. A factory with a complete QC approach should be able to explain how raw material purchasing, in-process inspection, and final packing checks are controlled. Wuxi Yaqin Trading Co., Ltd., for example, presents itself as a trading factory with export experience across multiple overseas markets and a QC system covering raw materials, production process, and packing. That does not replace your own verification, but it tells you what to ask for: process checkpoints, consistency controls, and how nonconforming pieces are handled before shipment.
Do not skip packaging and shipment checks
Packaging is often treated as the easy part, then becomes the source of preventable claims. In this product category, packaging has to do more than look neat. It should protect the bit tip and shank from impact, keep model identification readable, and support the compliance or documentation needs of the destination market where required. If your orders move through multiple warehouses or are bundled with other salon tools, label durability and carton organization deserve inspection. A strong tool packed carelessly can still arrive as a weak product experience.
For OEM or ODM programs, confirm the approval standard before production begins. A mismatch between your internal sample standard and the supplier’s shipping standard causes friction later. If one side is checking edge sharpness and concentricity while the other is mainly approving appearance and logo placement, the project may remain “approved” on paper and still create field complaints.
What a practical approval decision looks like
The strongest bulk-order decisions are rarely based on a perfect sample. They are based on whether the supplier can repeatedly produce within an acceptable performance window. If a sample set shows stable shank accuracy, controlled cutting, manageable heat, good cleaning behavior, and consistent packing, you are looking at a commercially usable result. If one piece feels excellent but another from the same sample lot already shows vibration or edge inconsistency, that is not a small defect. It is an early warning about production control.
For buyers comparing similar-looking models, a multi-functional tungsten steel design with fine, medium, and coarse options may be attractive because it covers several nail care tasks without making the line too complicated. The question is not whether that format sounds versatile. The question is whether the actual sample behaves predictably in filing, shaping, smoothing, and gel removal across repeated use. That is the point where a specification sheet stops being useful and your own checklist starts doing the real work.
So when someone asks, “How to test nail drill bit quality before placing bulk order?” the short answer is this: inspect the geometry, verify the shank, run the bit in real handpieces, compare cutting control across intended tasks, check wear after repeated cycles, and review packaging with the same seriousness as the tool itself. If a supplier can meet those checks consistently, the bulk order is no longer a leap of faith. It becomes a managed decision.
News List
- Preventing Gouges and Uneven Filing With Small Barrel Nail Drill BitsSep 20, 2026
- How Diameter and Grit Affect Small Barrel Nail Drill Bit PerformanceSep 20, 2026
- Can Hytos Nail Drill Bits Be Used Safely on Natural Nails and Gel Polish?Sep 20, 2026
- How to Verify Fit Between Hytos Nail Drill Bits and an E-File HandpieceSep 20, 2026
- Safe Speed Settings for Umbrella Nail Drill Bits Around the Nail FoldSep 20, 2026
- Umbrella vs Flame Nail Drill Bits: Which Shape Offers Better Cuticle Control?Sep 20, 2026
Best-Selling Products
 Cross Cut Safety Stainless Steel Tungsten Carbide Nail Drill Bits Salon Foot Use XF-C Grit for Removing Nails
 First-rate Quality Tungsten Carbide Nail Drill Bits Best Coating Manicure Remove Gel Nails Accessories
 Professional Advanced Safety Cuticle Bits Two-Way Rotate 3/32'' Carbide Tungsten 5 in 1 Nail Drill Bits
 Wholesale 5 in 1 Electric Manicure Nail Drill Bits Various Coating Cone Cuticle Bit with Rotary Cross Cut for Nail Art
 New Slant Tooth Tungsten Steel Nail Drill Bits Dead Skin Removal 5-in-1 Universal Grinding Nail Polish Head Tool Nail Drill Bits
 4.0mm Small 5 in 1 Integrated Sharpe Tungsten Nail Drill Bit Straight Teeth Gel Polish Removal
 Flame Sharp XF F M C XC Silver Safety Professional Corn Tungsten Carbide Nail Bit for Drill Machine Accessories
 Factory Direct 5 in 1 Tungsten Carbide Nail Drill Bits 6.8MM Cross Cut Safety Manicure 5 in 1 Nail Drill Bits








Please give us a message