
Essential tools for manicures that reduce lifting around the cuticle area
Essential tools for manicures that reduce lifting around the cuticle area
Lifting around the cuticle is usually a surface preparation problem before it becomes a product problem. When enhancement material or gel pulls away from the perimeter within days, the cause is often a thin band of invisible cuticle tissue, residual oil, excess moisture, or abrasion that was either too weak to create grip or too aggressive and left the natural nail stressed. The essential tools for manicures that reduce this kind of lifting are the ones that let the surface stay clean, even, and controlled right up to the margin without damaging the nail plate.
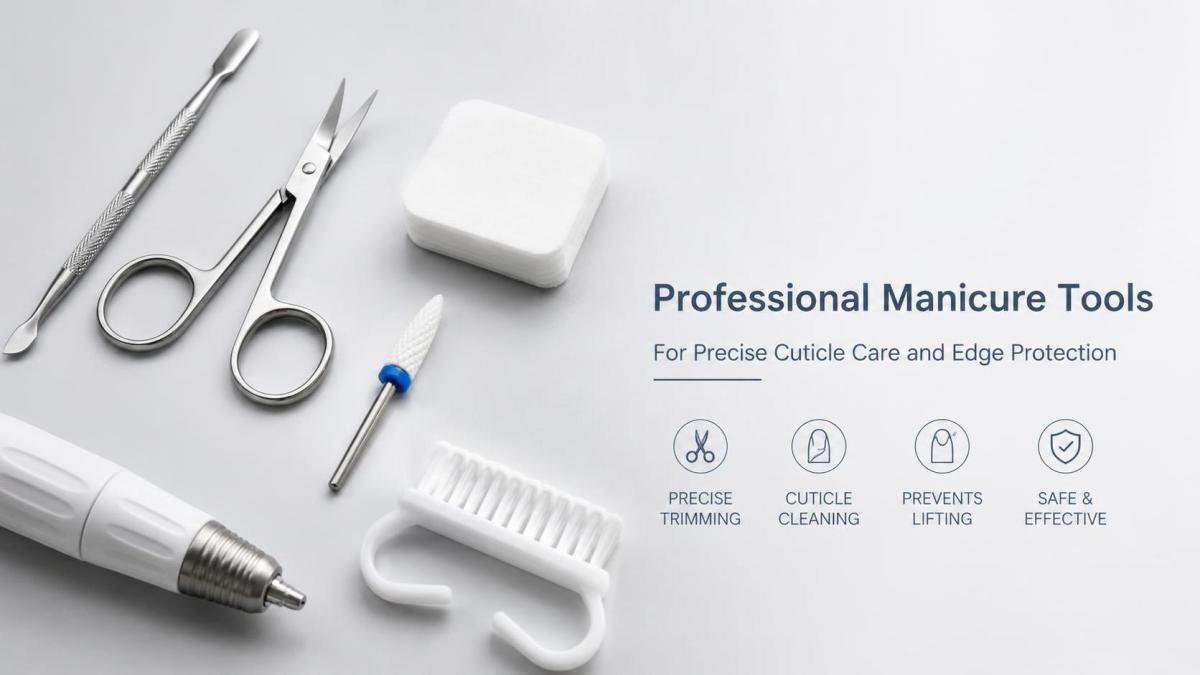
A precise cuticle pusher is the first tool that changes the result. Stainless steel pushers with a balanced edge are preferred because they can slide along the nail plate and lift the non-living tissue without tearing the surrounding skin. A broad spoon end is useful on larger nail plates, while a narrower curved edge gives better access near tight lateral folds. Pressure matters more than force. If the pusher skips across the surface, the angle is often too upright. When it lies too flat, it may smear softened tissue instead of lifting it. The goal is a smooth scrape that exposes a matte, clean perimeter rather than a shiny ring of residue.
Cuticle softener can help when the tissue is dry or compacted, but overuse introduces another risk. If softener remains in the sidewalls or under the proximal fold, the nail may look prepared while moisture stays trapped exactly where adhesion needs stability. Any softening step should be followed by a complete wipe and enough drying time. Skipping this pause is one of the common reasons lifting appears only around the cuticle while the rest of the coating remains attached.
Why cuticle nippers are useful only after the surface is already clean
Nippers are often blamed when the real issue is sequence. They do not prepare the nail plate; they remove lifted dead tissue after it has been pushed up and separated. If nippers are used too early, they can cut attached skin and create tenderness, redness, or micro breaks that later leak oil and moisture into the product edge. A sharp jaw with clean alignment is more important than a highly curved silhouette. Dull jaws tug, and tugging makes the operator chase the tissue instead of trimming it.
Small, controlled cuts are safer than trying to remove a whole rim in one motion. If the tissue stretches before it releases, the nipper should be sharpened or replaced. After trimming, the perimeter should appear clean but not carved out. Over-detailing the cuticle area may create a recessed margin that encourages product flooding during application.
Abrasive tools decide whether the product grips or peels
Among all essential tools for manicures, abrasive tools are often the most misunderstood. Their task is not to thin the natural nail. They refine the surface, remove residual cuticle film, and create a consistent texture for adhesion. A hand file can work for this, but around the cuticle a well-matched abrasive bit often gives better precision because it reaches the tight zone where flat files cannot maintain the same contact.
Bit shape and grit should match the task. A fine flame bit is widely used to open the cuticle pocket and clean the sidewalls. A small tapered bit can refine compact areas where product tends to lift first. Coarse grit near the cuticle is usually unnecessary unless old product removal is involved, and even then it should not touch the natural nail plate. Fine or medium-fine abrasive surfaces are generally easier to control at the margin because they cut residue gradually instead of grabbing. If the bit leaves deep circular tracks, the speed may be too high, the grit too aggressive, or the pressure too heavy.
Material choice also affects handling. Diamond-coated bits are commonly selected for cuticle work because they abrade evenly and tolerate repeated sanitation when maintained correctly. Ceramic or carbide styles are more often used for product removal and may be too strong near fresh natural growth if used carelessly. Whatever the material, a bit that is clogged with dust and skin debris stops cutting consistently and begins to burnish the surface. That polished surface can look neat while actually reducing adhesion.
Speed control is part of the tool, not a separate topic. A quality e-file handpiece with low vibration gives better feedback, especially at the cuticle line where one millimeter changes the result. Excess vibration makes it hard to tell whether the bit is cleaning tissue or bouncing over the plate. Heat is another warning sign. If the surface becomes warm during prep, friction is already too high, and the nail should be cooled and reassessed before any product is applied.

Brushes and wipes affect more than cleanliness
Dust left around the proximal fold is a quiet source of lifting. It mixes with base product, prevents full contact, and often creates a rough halo that later catches during wear. A dense manicure dust brush with compact but flexible bristles is more reliable than a very soft cosmetic brush because it can lift debris out of the sidewalls instead of just moving it across the surface. Bristles that are too stiff, however, may irritate freshly prepped skin and stimulate oil release.
Lint-free wipes matter for the same reason. Cotton fibers can cling to the edge of the nail and stay nearly invisible until product is laid over them. Once sealed under gel or base, those fibers become an anchor point for separation. A proper wipe saturated but not dripping with cleanser or dehydrator should leave the plate uniformly dry. If shiny patches reappear within seconds, the surface may need another pass because residual oils are still present.
Dehydrators, cleansers, and primers are not interchangeable
Liquid prep products are often grouped together, yet each one solves a different problem. A cleanser removes surface contamination. A dehydrator temporarily reduces moisture and oil. A primer changes the bonding condition of the nail surface. Using them in the wrong order can leave the plate over-wet or chemically uneven. For lifting near the cuticle, this matters because the perimeter is the first place where excess liquid pools.
Application should be minimal and deliberate. Flooding primer into the cuticle pocket may create rebound lifting because the product later cures over a slick or over-saturated edge. If acid-free primer is being used, it still needs to be confined to the nail and kept away from skin. If an acid-based formula is required for a difficult surface, the margin for error becomes smaller, and careful dosage is even more important. The best prep liquid is not the one applied most heavily, but the one that leaves the plate conditioned without residue.
Lighting and magnification are practical tools, not luxuries
A bright, shadow-controlled task light often prevents more lifting than changing brands of product. In weak lighting, residual cuticle appears blended into the nail plate, and tiny sidewall debris is easy to miss. Neutral white illumination shows the difference between dead tissue, dust, shine, and exposed nail more clearly than warm ambient light. Magnification helps on narrow nail plates, deep sidewalls, and pale natural nails where the boundary is harder to read. When visibility improves, unnecessary abrasion usually decreases because the prep becomes targeted instead of approximate.
Application brushes must match the cuticle margin
Even perfect prep can be ruined by a brush that drops too much product near the edge. A manicure brush with a sharply defined tip allows the material to be nudged close to the cuticle without touching skin. If the bristles fan out unevenly or have dried product near the ferrule, control drops immediately. Product then floods the sidewalls, shrinks back during cure, and leaves a weak border that looks sealed at first but opens during wear.
Brush loading should be adjusted to the viscosity of the product and the ambient temperature. Warmer rooms often make gels and bases move faster, which means the same amount of product that behaved well in one session may creep into the cuticle zone in another. Holding the finger slightly downward for a moment can help pull material away from the skin line before curing, but this only works if the initial amount was controlled.
Tool maintenance changes adhesion consistency
Many lifting problems are repeated because tool wear is gradual and easy to ignore. A cuticle pusher with a rolled edge starts sliding over residue instead of lifting it. A nipper that no longer closes fully leaves ragged tissue. Abrasive bits become smooth, loaded, or unbalanced. Brushes harden near the base of the bristles. None of these failures looks dramatic on its own, yet each one reduces precision at the exact location where product needs the most accurate placement.
Cleaning routines should separate visible debris removal from full sanitation. Bits should be brushed clean before any wet processing so packed particles do not harden in the abrasive surface. After disinfection and drying, they should be stored where the cutting area does not knock against other metal tools. Files and buffers used on natural nails need replacement before they lose their intended grit behavior. Trying to extend abrasive life too far often produces inconsistent scratch patterns, and inconsistent scratch patterns are difficult to bond over evenly.
Common misreads that lead to unnecessary rework
A white ring near the cuticle after filing is not always a sign of proper prep. It may simply be over-filed keratin dust compressed into the surface. A nail plate that feels squeaky can still have cuticle film attached. A dry-looking margin may still contain solvent if prep liquids were layered too quickly. Another common misread is assuming every cuticle-area lift comes from the base product. In practice, it may begin with a contaminated sidewall, skin contact during application, incomplete removal of old product at the edge, or a cured ridge that catches during daily use and starts peeling backward.
Transport and storage conditions can also affect tool behavior in subtle ways. Abrasive products exposed to humidity may cut differently from fresh stock, and brushes stored without caps can accumulate dust or deform at the tip. If the same prep method suddenly starts giving irregular results, the issue may be with tool condition rather than technique alone.
The best working setup is usually the one that keeps every step visible, dry, and repeatable: a stable pusher, sharp nippers used sparingly, fine abrasive bits suited to cuticle work, low-lint cleaning materials, measured prep liquids, and brushes that place product exactly where intended. When these tools are selected and maintained with that purpose in mind, lifting around the cuticle area becomes easier to prevent before the first coat is even applied.
Lifting around the cuticle is usually a surface preparation problem before it becomes a product problem. When enhancement material or gel pulls away from the perimeter within days, the cause is often a thin band of invisible cuticle tissue, residual oil, excess moisture, or abrasion that was either too weak to create grip or too aggressive and left the natural nail stressed. The essential tools for manicures that reduce this kind of lifting are the ones that let the surface stay clean, even, and controlled right up to the margin without damaging the nail plate.
A precise cuticle pusher is the first tool that changes the result. Stainless steel pushers with a balanced edge are preferred because they can slide along the nail plate and lift the non-living tissue without tearing the surrounding skin. A broad spoon end is useful on larger nail plates, while a narrower curved edge gives better access near tight lateral folds. Pressure matters more than force. If the pusher skips across the surface, the angle is often too upright. When it lies too flat, it may smear softened tissue instead of lifting it. The goal is a smooth scrape that exposes a matte, clean perimeter rather than a shiny ring of residue.
Cuticle softener can help when the tissue is dry or compacted, but overuse introduces another risk. If softener remains in the sidewalls or under the proximal fold, the nail may look prepared while moisture stays trapped exactly where adhesion needs stability. Any softening step should be followed by a complete wipe and enough drying time. Skipping this pause is one of the common reasons lifting appears only around the cuticle while the rest of the coating remains attached.
Why cuticle nippers are useful only after the surface is already clean
Nippers are often blamed when the real issue is sequence. They do not prepare the nail plate; they remove lifted dead tissue after it has been pushed up and separated. If nippers are used too early, they can cut attached skin and create tenderness, redness, or micro breaks that later leak oil and moisture into the product edge. A sharp jaw with clean alignment is more important than a highly curved silhouette. Dull jaws tug, and tugging makes the operator chase the tissue instead of trimming it.
Small, controlled cuts are safer than trying to remove a whole rim in one motion. If the tissue stretches before it releases, the nipper should be sharpened or replaced. After trimming, the perimeter should appear clean but not carved out. Over-detailing the cuticle area may create a recessed margin that encourages product flooding during application.
Abrasive tools decide whether the product grips or peels
Among all essential tools for manicures, abrasive tools are often the most misunderstood. Their task is not to thin the natural nail. They refine the surface, remove residual cuticle film, and create a consistent texture for adhesion. A hand file can work for this, but around the cuticle a well-matched abrasive bit often gives better precision because it reaches the tight zone where flat files cannot maintain the same contact.
Bit shape and grit should match the task. A fine flame bit is widely used to open the cuticle pocket and clean the sidewalls. A small tapered bit can refine compact areas where product tends to lift first. Coarse grit near the cuticle is usually unnecessary unless old product removal is involved, and even then it should not touch the natural nail plate. Fine or medium-fine abrasive surfaces are generally easier to control at the margin because they cut residue gradually instead of grabbing. If the bit leaves deep circular tracks, the speed may be too high, the grit too aggressive, or the pressure too heavy.
Material choice also affects handling. Diamond-coated bits are commonly selected for cuticle work because they abrade evenly and tolerate repeated sanitation when maintained correctly. Ceramic or carbide styles are more often used for product removal and may be too strong near fresh natural growth if used carelessly. Whatever the material, a bit that is clogged with dust and skin debris stops cutting consistently and begins to burnish the surface. That polished surface can look neat while actually reducing adhesion.
Speed control is part of the tool, not a separate topic. A quality e-file handpiece with low vibration gives better feedback, especially at the cuticle line where one millimeter changes the result. Excess vibration makes it hard to tell whether the bit is cleaning tissue or bouncing over the plate. Heat is another warning sign. If the surface becomes warm during prep, friction is already too high, and the nail should be cooled and reassessed before any product is applied.
Brushes and wipes affect more than cleanliness
Dust left around the proximal fold is a quiet source of lifting. It mixes with base product, prevents full contact, and often creates a rough halo that later catches during wear. A dense manicure dust brush with compact but flexible bristles is more reliable than a very soft cosmetic brush because it can lift debris out of the sidewalls instead of just moving it across the surface. Bristles that are too stiff, however, may irritate freshly prepped skin and stimulate oil release.
Lint-free wipes matter for the same reason. Cotton fibers can cling to the edge of the nail and stay nearly invisible until product is laid over them. Once sealed under gel or base, those fibers become an anchor point for separation. A proper wipe saturated but not dripping with cleanser or dehydrator should leave the plate uniformly dry. If shiny patches reappear within seconds, the surface may need another pass because residual oils are still present.
Dehydrators, cleansers, and primers are not interchangeable
Liquid prep products are often grouped together, yet each one solves a different problem. A cleanser removes surface contamination. A dehydrator temporarily reduces moisture and oil. A primer changes the bonding condition of the nail surface. Using them in the wrong order can leave the plate over-wet or chemically uneven. For lifting near the cuticle, this matters because the perimeter is the first place where excess liquid pools.
Application should be minimal and deliberate. Flooding primer into the cuticle pocket may create rebound lifting because the product later cures over a slick or over-saturated edge. If acid-free primer is being used, it still needs to be confined to the nail and kept away from skin. If an acid-based formula is required for a difficult surface, the margin for error becomes smaller, and careful dosage is even more important. The best prep liquid is not the one applied most heavily, but the one that leaves the plate conditioned without residue.
Lighting and magnification are practical tools, not luxuries
A bright, shadow-controlled task light often prevents more lifting than changing brands of product. In weak lighting, residual cuticle appears blended into the nail plate, and tiny sidewall debris is easy to miss. Neutral white illumination shows the difference between dead tissue, dust, shine, and exposed nail more clearly than warm ambient light. Magnification helps on narrow nail plates, deep sidewalls, and pale natural nails where the boundary is harder to read. When visibility improves, unnecessary abrasion usually decreases because the prep becomes targeted instead of approximate.
Application brushes must match the cuticle margin
Even perfect prep can be ruined by a brush that drops too much product near the edge. A manicure brush with a sharply defined tip allows the material to be nudged close to the cuticle without touching skin. If the bristles fan out unevenly or have dried product near the ferrule, control drops immediately. Product then floods the sidewalls, shrinks back during cure, and leaves a weak border that looks sealed at first but opens during wear.
Brush loading should be adjusted to the viscosity of the product and the ambient temperature. Warmer rooms often make gels and bases move faster, which means the same amount of product that behaved well in one session may creep into the cuticle zone in another. Holding the finger slightly downward for a moment can help pull material away from the skin line before curing, but this only works if the initial amount was controlled.
Tool maintenance changes adhesion consistency
Many lifting problems are repeated because tool wear is gradual and easy to ignore. A cuticle pusher with a rolled edge starts sliding over residue instead of lifting it. A nipper that no longer closes fully leaves ragged tissue. Abrasive bits become smooth, loaded, or unbalanced. Brushes harden near the base of the bristles. None of these failures looks dramatic on its own, yet each one reduces precision at the exact location where product needs the most accurate placement.
Cleaning routines should separate visible debris removal from full sanitation. Bits should be brushed clean before any wet processing so packed particles do not harden in the abrasive surface. After disinfection and drying, they should be stored where the cutting area does not knock against other metal tools. Files and buffers used on natural nails need replacement before they lose their intended grit behavior. Trying to extend abrasive life too far often produces inconsistent scratch patterns, and inconsistent scratch patterns are difficult to bond over evenly.
Common misreads that lead to unnecessary rework
A white ring near the cuticle after filing is not always a sign of proper prep. It may simply be over-filed keratin dust compressed into the surface. A nail plate that feels squeaky can still have cuticle film attached. A dry-looking margin may still contain solvent if prep liquids were layered too quickly. Another common misread is assuming every cuticle-area lift comes from the base product. In practice, it may begin with a contaminated sidewall, skin contact during application, incomplete removal of old product at the edge, or a cured ridge that catches during daily use and starts peeling backward.
Transport and storage conditions can also affect tool behavior in subtle ways. Abrasive products exposed to humidity may cut differently from fresh stock, and brushes stored without caps can accumulate dust or deform at the tip. If the same prep method suddenly starts giving irregular results, the issue may be with tool condition rather than technique alone.
The best working setup is usually the one that keeps every step visible, dry, and repeatable: a stable pusher, sharp nippers used sparingly, fine abrasive bits suited to cuticle work, low-lint cleaning materials, measured prep liquids, and brushes that place product exactly where intended. When these tools are selected and maintained with that purpose in mind, lifting around the cuticle area becomes easier to prevent before the first coat is even applied.
News List
- Preventing Gouges and Uneven Filing With Small Barrel Nail Drill BitsSep 20, 2026
- How Diameter and Grit Affect Small Barrel Nail Drill Bit PerformanceSep 20, 2026
- Can Hytos Nail Drill Bits Be Used Safely on Natural Nails and Gel Polish?Sep 20, 2026
- How to Verify Fit Between Hytos Nail Drill Bits and an E-File HandpieceSep 20, 2026
- Safe Speed Settings for Umbrella Nail Drill Bits Around the Nail FoldSep 20, 2026
- Umbrella vs Flame Nail Drill Bits: Which Shape Offers Better Cuticle Control?Sep 20, 2026
Best-Selling Products
 Cross Cut Safety Stainless Steel Tungsten Carbide Nail Drill Bits Salon Foot Use XF-C Grit for Removing Nails
 First-rate Quality Tungsten Carbide Nail Drill Bits Best Coating Manicure Remove Gel Nails Accessories
 Professional Advanced Safety Cuticle Bits Two-Way Rotate 3/32'' Carbide Tungsten 5 in 1 Nail Drill Bits
 Wholesale 5 in 1 Electric Manicure Nail Drill Bits Various Coating Cone Cuticle Bit with Rotary Cross Cut for Nail Art
 New Slant Tooth Tungsten Steel Nail Drill Bits Dead Skin Removal 5-in-1 Universal Grinding Nail Polish Head Tool Nail Drill Bits
 4.0mm Small 5 in 1 Integrated Sharpe Tungsten Nail Drill Bit Straight Teeth Gel Polish Removal
 Flame Sharp XF F M C XC Silver Safety Professional Corn Tungsten Carbide Nail Bit for Drill Machine Accessories
 Factory Direct 5 in 1 Tungsten Carbide Nail Drill Bits 6.8MM Cross Cut Safety Manicure 5 in 1 Nail Drill Bits








Please give us a message